
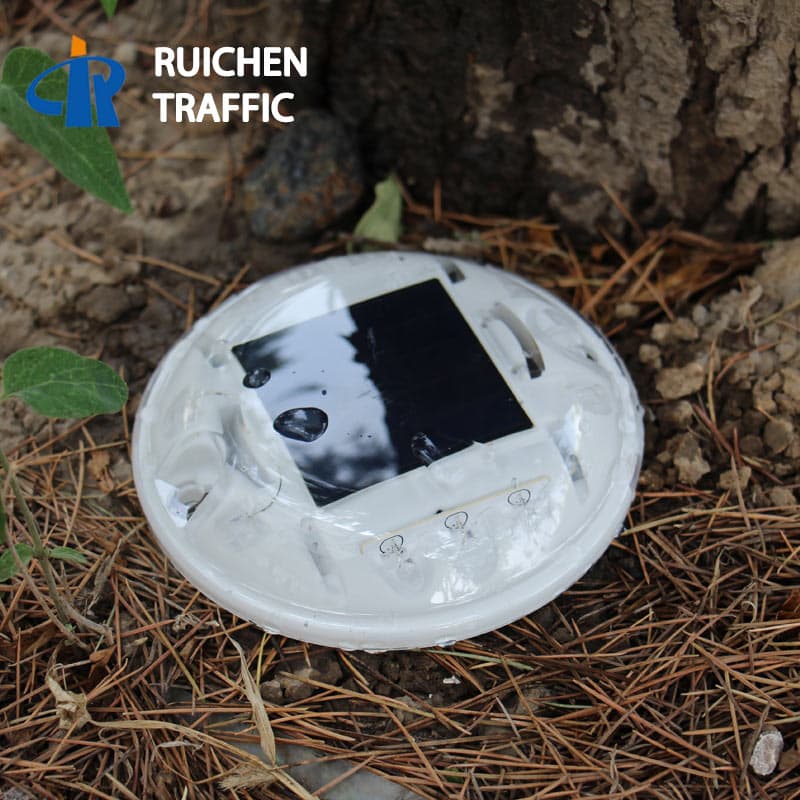
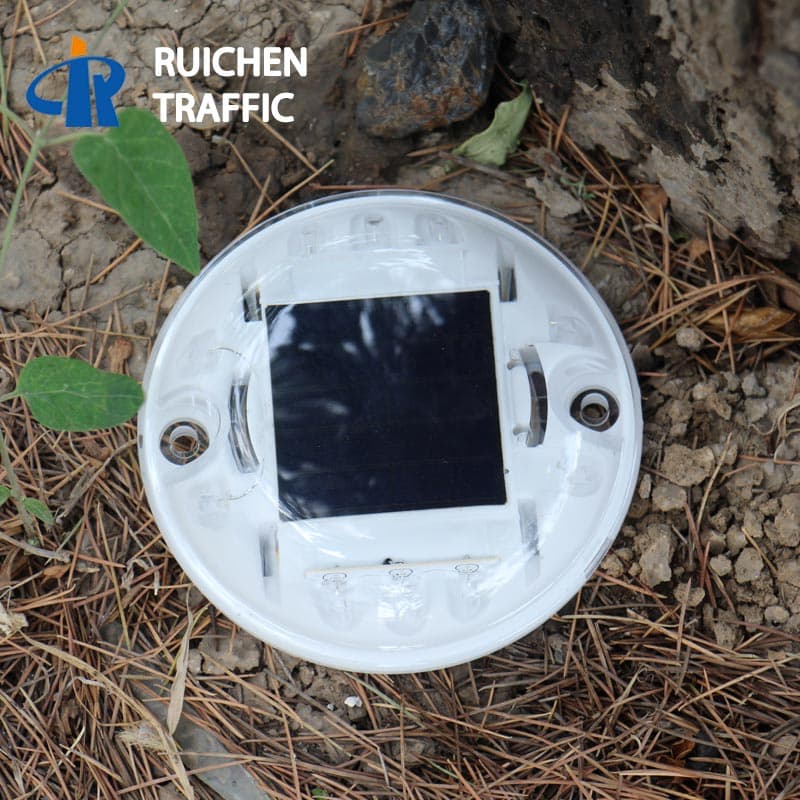
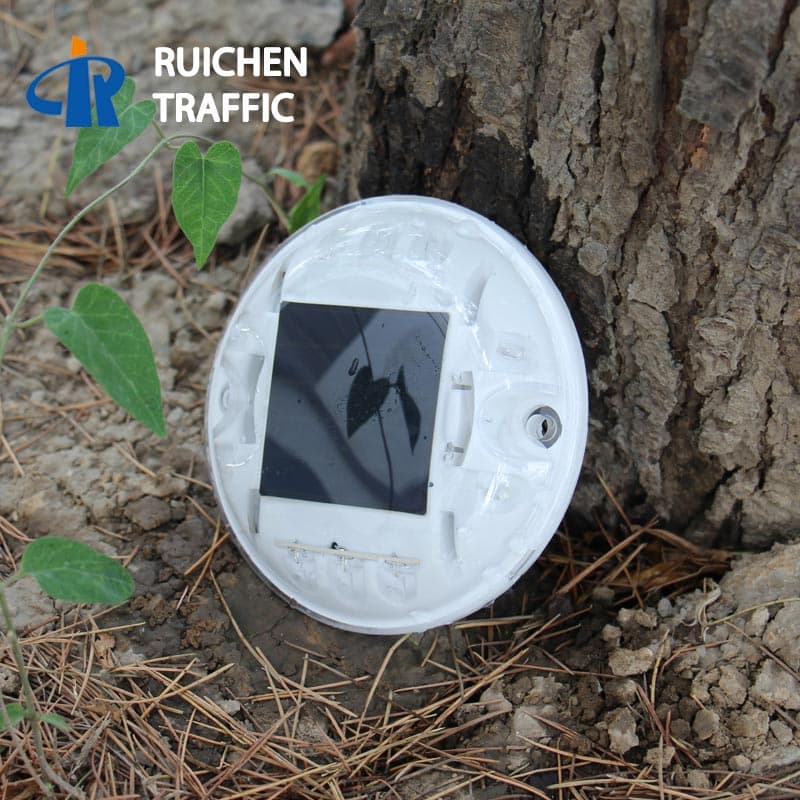
Body material: PC(Japan Brand)
Warranty: 12 Months
Power supply: USA Brand Flexible High Efficient Solar Panel 5V/0.4W
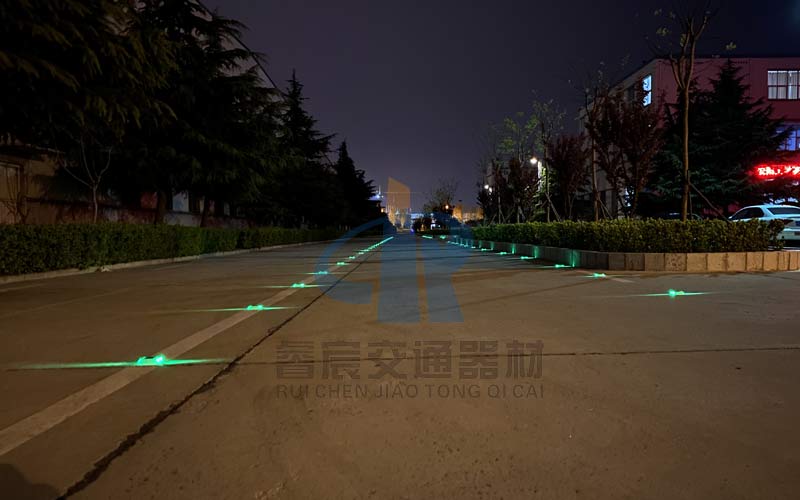
Visual distance: > 800m
Load Bearing: 20 Tons
Working Mode: Flashing or Constant
Waterproof: IP68
Shank: Without shank

3m Round Road Stud Light Features
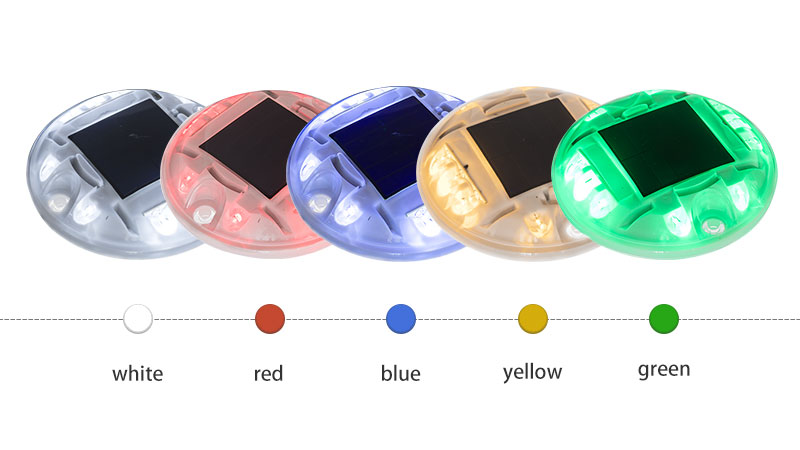
Five colors for choice: White, Amber, Red, Blue, Green
3m Round Road Stud Lights Parameters
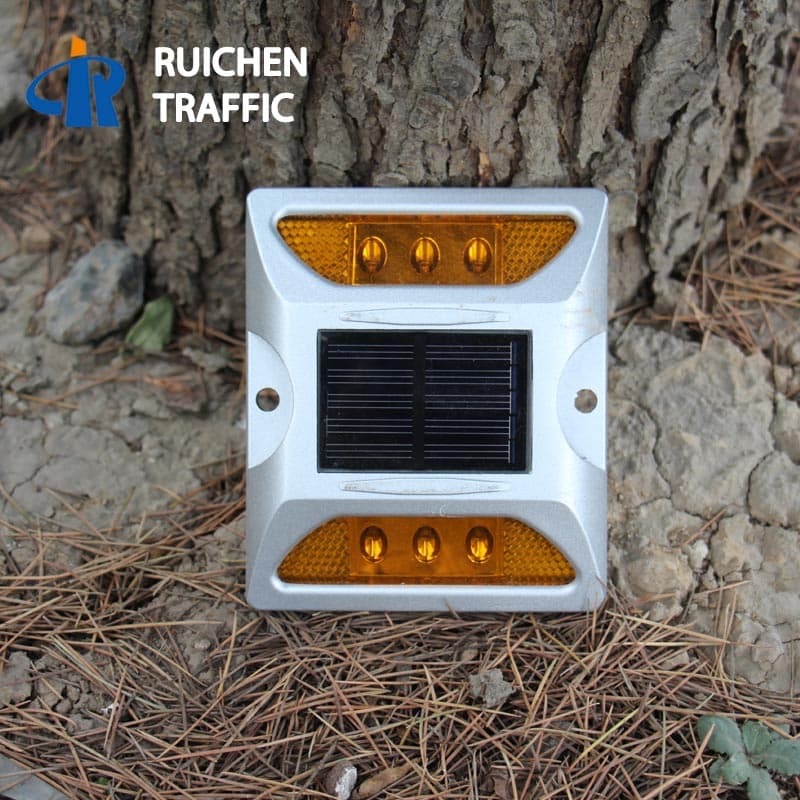
| Material: | PC(Japan Brand) |
| Power supply: | USA Brand Flexible High Efficient Solar Panel 5V/0.4W |
| Battery: | NI-MH 1.2V/600MAH or Lithium battery 3.2V/500MA |
| Working model: | Blinking or Constant Charging in daytime and working automatically at night |
| LED colors: | Yellow, White, Red, Green, Blue |
| Life span: | >3 Years |
| Load Bearing: | 20T |
| Size: | φ117*23mm (φ4.61″*0.91″) |
| Visual distance: | >800M |
| Water poof: | IP68 |
| Carton Size: | 2pcs/box; 60pcs/ctn; weight: 19kgs; carton size: 67.5*28*20cm 2pcs/box; 60pcs/ctn; weight: 41.49bs; carton size: 26.57″*11.02″*7.87″ |
Application of PC Road Studs Light B1:
♥Schools and hospitals
♥Gardens
♥Deck and Dock
♥Walking paths
♥Bridge
♥Parks and campuses
♥Roundabout
How to install PC Round Road Studs Light for Garden B1:

Load Bearing: More Than 30 Tons
Warranty: 18 Months
Body material: GB Cast Aluminium alloy
Power supply: USA Brand Flexible High Efficient Solar Panel (2.5V/0.38W)
Visual distance: > 800m
Working Mode: Flashing or Constant
Waterproof: IP68
Shank: With shank or Without shank
Load Bearing: >20T(static)
Warranty: 12 Months
Body material: GB Cast Aluminium alloy
Power supply: Solar panel(monocrystalline 2.5V/0.2W)
Visual distance: > 800m
Working Mode: Flashing or Constant
Waterproof: IP68
Shank: With shank or Without shank


